
Customers, how and why we need to create them.
When working in Equipment Manager there are five basic elements that are required to begin work. These elements, Customer, Job Site, Equipment, Client and Technician have to be in place to allow a Service Request to be created which will allow a Technican to begin working on the assigned Equipment.
Understanding the Customer
The Customer is the contact who holds ownership of the job site and the equipment. Often it is the case in a commercial setting that the person who calls the contractor to service the equipment is not always the person who owns the equipment but often is the tenant that is leasing and directly interacting with the equipment. The Contractor may be required by contract to respond to issues that may arise, but may be required to see permission from the building owner before making changes to the equipment. The person who is leasing and paying for service would be the Client, while the owner would be the Customer in the Equipment Manager system.
In some other instances such as residential, the person who calls the Contractor may be the Customer and that customer may also inhabit the building and paying for services. In this case the Customer and the Client are one and the same. When the Customer is also the client, the customer would also have a matching client profile. The Customer is resposible for ownership of the equipment and making decisions on replacement, maintenance and updates. Customer profiles are used for contact info and are never billed or invoiced and is never passed to QuickBooks Online.
Setting up a Customer in EM
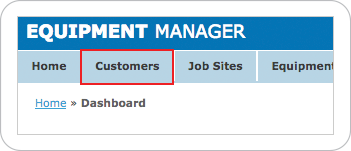
To begin creating a new customer we need to first navigate to the Manage Customers listing page. We do this by either clicking on the Customers button in the main menu at the top of every page, or by clicking on the Customer Icon on the main page as shown above.
Once on the Customer listing page we will see all customers that the Contractor has created. The Customer listing will provide basic information about the Customer including company name, customer name, email, address, and active status. Once a customer account is tied to a Job Site and assigned equipment, the Customer cannot be removed from the system due to the complex relation of information tied to that customer.
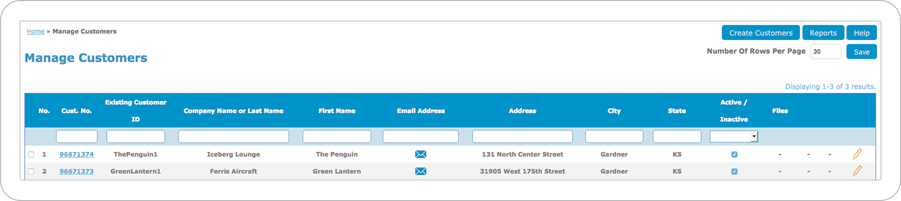
Once we are on the listing page as seen above in our Batjak example, we need to click the Create Customer button at the top right of the screen.
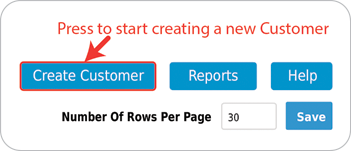
Once pressed the New Customer info page will load. This page is where you will enter basic info about the Customer including Name, Address, and contact info. Beyond that are some other important fields of information that Equipment Manager wants to know about your customer.
Existing Customer ID
Every Customer that is entered into Equipment Manager is given a unique ID number to the EM system. We understand that this number will not match the identification that you have related to the Customer in the past. There for you are given a field to place your previous Customer ID. This will allow you to find this customer using that ID in the listing.
Company or Last Name
In some instances, the owner of a Job Site or Equipment may be a person or a company. The First Name field is not required and if the Owner is a Company simply put the Company Name in this field and ignore the First Name field. If the owner is a person, filling out the first and last name field will do the trick.
Special Instructions
There may be something special about this Customer that you need to let your field personel know about. Maybe someone needs to be contacted before showing up on a job site. In a case like this you can enter a notice or notes into this field. Anytime a Technician selects a piece of Equipment that is attached to this Customer the mobile device will display your info as a notice to the Technician.
Schedule Alert Emails
If for instance your Customer is a company, there may be multiple people that the Customer wants to be notified if a scheduled inspection is coming due or past due. You can put as many emails as needed into this field separated by semicolons. ( ; )
Schedule Emails
In the Contractors profile you filled out a default Schedule Email subject line and body text. If there is a reason you wanted to customize this Subject Line and Text you can do so here for all Schedule notice emails.
Past Due Emails
Like Schedule Emails, in the Contractors profile you filled out a default Past Due Email subject line and body text. If there is a reason you wanted to customize this Subject Line and Text you can do so here for all Past Due notice emails.
Notes
This box is for if you want to make any notes that are strictly related to this particular Customer. You can put in as many notes as needed and can use the Date Timestamp button to enter a timestamp into your notes as needed.
Media
This box is for providing any media in the form of Images and PDF documents that might be related to the Customer. You will have the opportunity to upload the same types of media for any Job Site or piece of Equipment where needed.
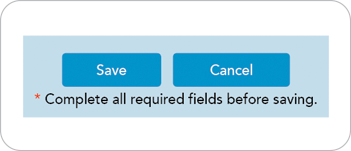
This completes the setup process for setting up a new Customer. Before you go any further you need to press the save button at the top right or bottom of the screen. Once done successfully you will be taken back to the Customer Listing page and you should see your new Customer in the listing.
