
Web Pages
The inventory module for web consists of ¬seven pages of listing screens. These include Inventory Items, Locations, Sub-Locations, Items by Locations, Transfers, Inventory Use and Units of Measure. All pages are accessible by the web user.
Inventory Items Listing
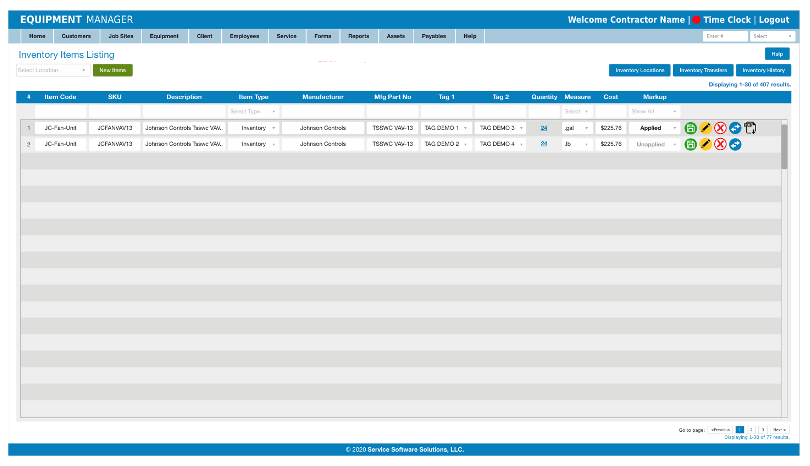
The Item Listing page allows the web user to view items by the Item Code. The page is designed to show all items for a specified location. Items with multiple sub-locations are combined to reduce the list space. The user can do most basic inventory actions from this page including Adding, Removing, Transferring and Editing items. Most fields are sortable.
 In addition this page is designed to allow the user to edit most of the item data directly on the page. The fields can be changes and once the data has been updated the user can press the green save button allowing the data to be saved to the server.
 To the right of the save button is the Edit Icon. This will launch the Edit Item popup that will allow the user to make edits and additional changes to the item that are not available from the listing fields. These additional changes include editing images and the extended or long description.
 Next the disable button, this will allow the user to quickly disable the item from being used by anyone in the system. This button will only work if the item has no quantity in the system. If the item has a quantity then that quantity has to be removed before the item can be disabled.
 The transfer item icon allows the user to open the Transfer Item popup and select any available source location and then choose a new destination. Once complete the items will be transferred.
 Clicking the Download PDF icon will allow the user to download a copy of the Item Bio in PDF form.
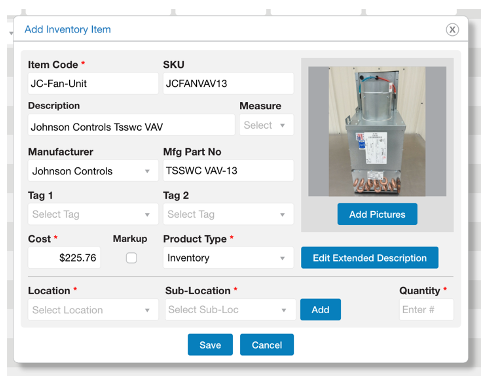
New Item Button – in the upper left, the user has the ability to add new items to the system. This button will trigger a popup that will collect information about the new item being added. In addition, the user will be able to add pictures, and an extended description.
Unit of Measure – take the user to the Units of Measure Listing page.
Inventory Locations Button – takes the user to the Inventory Locations listing page.
Inventory Transfers Button – takes the user to the Inventory Transfers listing page.
Inventory History Page – takes the user to the Inventory History listing page.
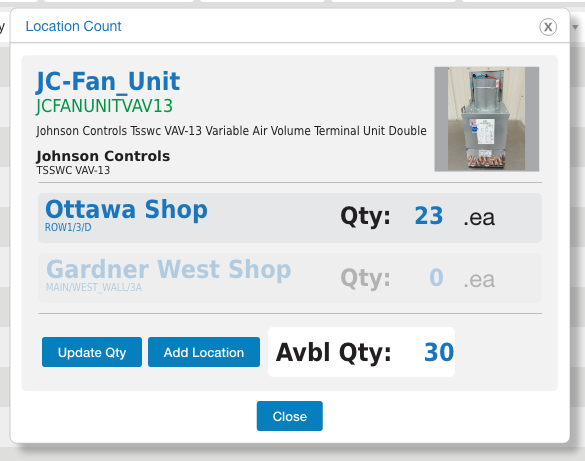 Location Count Popup
Clicking the quantity hyperlinked text in the listing will launch the Location Count popup. This allows the user to see all the locations and sub-locations that contain the exact same item if the item is to be found in more than one location. This allows the user to see how many of the item are in the system as a whole and by location and then see the by sub-location breakdown.
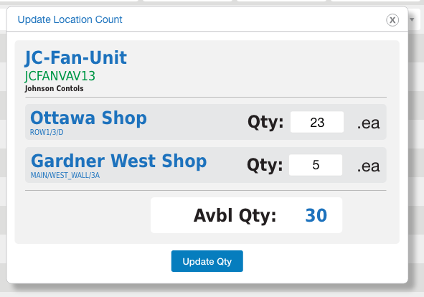 Update Location Count Popup
From the Location Count popup the user can click the Update Quantity to open the Update Location Count popup, this will allow the user to update the count in any or all the locations as needed. Clicking the Update Count at the bottom to save the updated data.
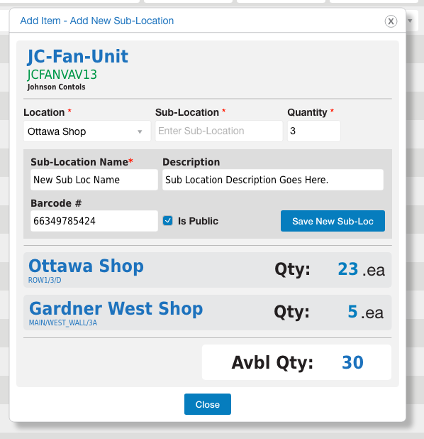 Add Item – Update Location/Sub-Location Popup
From the Location Count popup, the user can click on the Update Location to popup the Add Item – Location Update popup. This box will allow the user to add new locations and sub-locations to the item allowing the user to add new quantity and locations to the system for the item. The user has the option to add a new sub-location from this box. Adding a new sub-location will allow the user to enter a new sub-location name, description, barcode and specify if the sub-location is public.
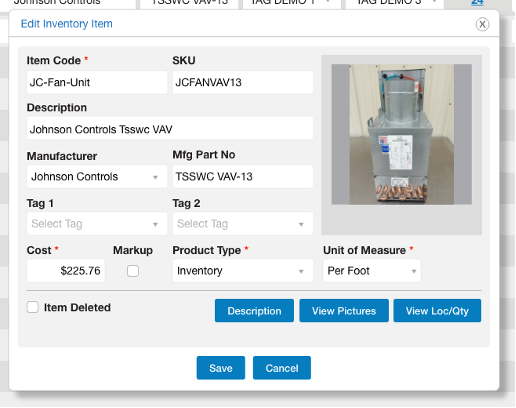 Edit Inventory Item Popup
This popup will allow the user to edit all fields of the inventory item. The only difference from this edit and add popup is the addition of the Item Deleted checkbox. This checkbox, when the item has NO quantity in any sub-location will remove the item from view to all users by default. Deleted items can be view by going to the item listing page and viewing disabled items. In addition, the location and sub-location fields are replaced by the View Loc/Qty button. This allows the user to see all Location, Sub-Locations and Quantities for the item in the system.
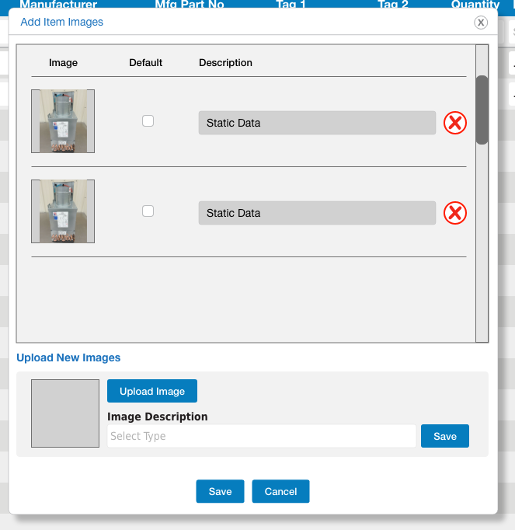 Add Item Images Popup
Selecting the View Pictures on the Add/Edit Items popup will show the Add Item Images window. This popup will allow the user to upload as many images as needed for any item in the system. When Images are upload the user can specify a description for the images. In addition, web users can specify if the image is to be the default image that will show up in the item profile. Mobile users who upload images, the first image uploaded will automatically become the default image.
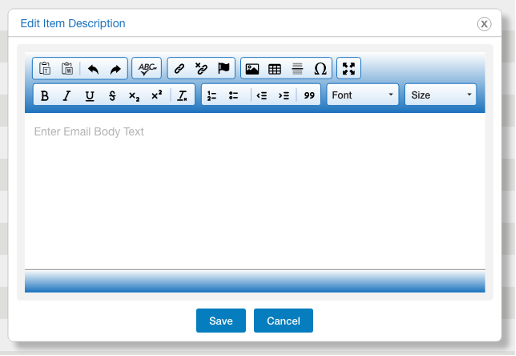 Edit Item Description Popup
Selecting the Description button will launch a popup window allowing the user to enter and edit the item long description. This is where a web user can enter extensive details about the item. Things that others might need to know about the items history, installation or even purchase history. Once done the item description can be saved. It will display to the user in the item info.
 Transferring Item Popup
When clicking on the Transfer Icon, the user will launch the Transferring Item popup. This box will allow the user to view all Locations and Sub-Locations where the item is located. The user can then choose the Sub-Location they wish to pull items from as the source for the transfer. Once done the user will then choose the destination by selecting a new Location and Sub-Location and enter the quantity of the item they wish to transfer. If this is done on the web, the item will be transferred immediately.
 Download Item PDF
The web user has the option to download a PDF bio page that the system will generate about the item. This is designed large and important items that have a lot of information. The bio can be printed and used to verify the items details.
Inventory Locations Listing
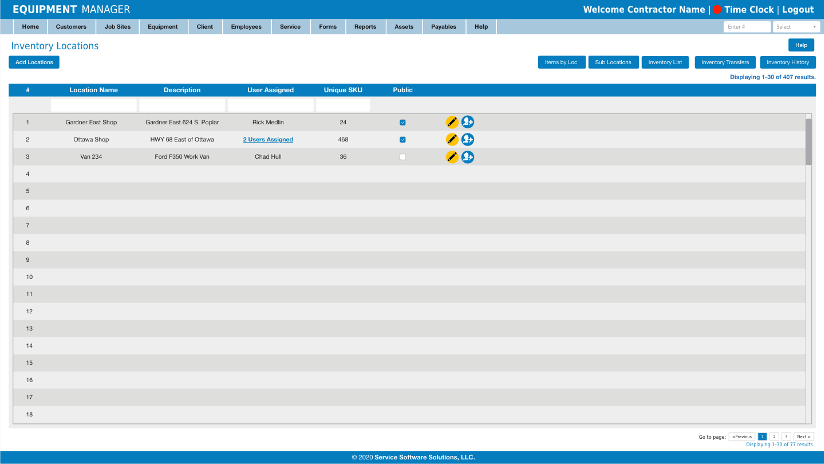
The location listing page allows the user to view all the locations that have been entered by the Contractor to the system. New locations can be entered and existing locations updated.
The Edit Icon will allow the user to adjust the Location Name and Description for the location.
 The Assigned User icon will launch the Add/Edit Location Users popup.
Add/Edit Location Users Popup
The popup will allow the Contractor to add new mobile users to a selected location. The existing users assigned to the location. Each user that can be added and the user can be assigned permissions to allow the user to Add Items and Allow Transfers.
Add Items when NOT checked will disallow the related user from adding items to the related to the location. It removes the button that allows the user to add items to the location.
The Allow Transfers when NOT checked will prohibit the user from moving items between locations. It will remove the button option on the mobile for transferring items.
Inventory Sub-Locations Listing
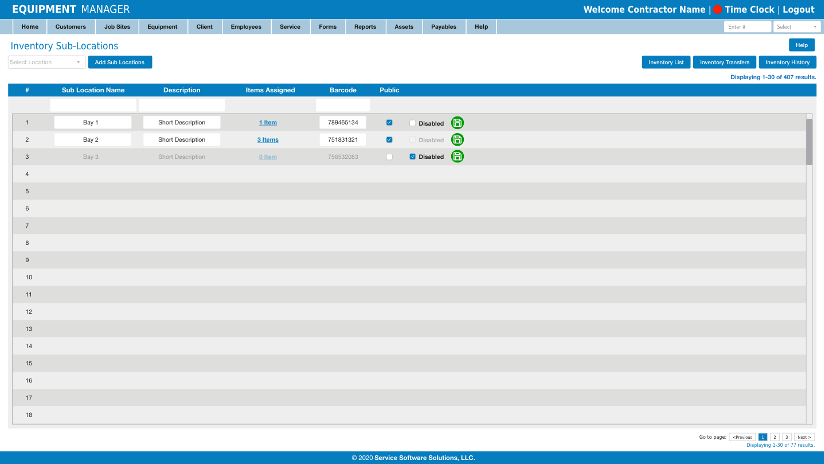
The sub-location listing page will allow the user to view all the sub-locations for any selected location. The user has the ability to edit the sub-location data in the listing. In addition to adding new sub-locations.
If the user chooses to edit the data in the listing, the user will need to save the data.
 Add Sub-Locations Button
When an item is entered into the system, the user will be asked to enter in where in the general location is the item is located, this is the Sub-Location. The web user can enter sub-locations for any location without the need for items as needed. In addition, sub-locations can be set as public or not and disabled.
To be public means that the Sub-Location will show up to all mobile and web users. You might make a sub-location not public if you wanted to place items in a location and have them not be transferred out. If the public box is NOT checked, the item will only be visible to the web and assigned mobile users even if the location is public.
The Disable checkbox for the Sub-Location on the web as a way to hide the Sub-Location from all users. Disabled sub-locations are not visible anywhere except from Sub-locations listing page. Sub-Locations can NOT be disabled unless the location has NO items. If items are assigned the checkbox should NOT be checkable. Clicking on the box will prompt a message “All items must be removed before the Sub-Location can be disabled.”
Inventory Items By Location Listing
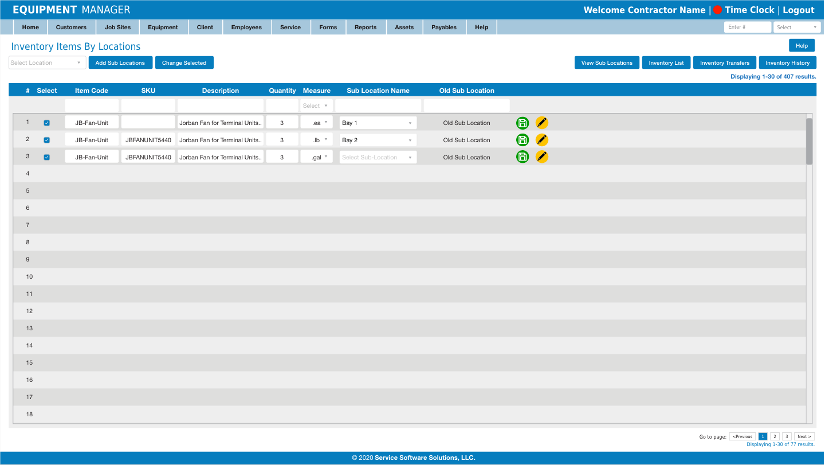
The Items by Location page allows the user to view Items by Sub-Location. This listing will show the user all the same items by location but any instances where the same item can be found more than once in the location by being located in more than one sub-location, they will be listed as many times in the listing as there are sub-locations. This is done to show the user all sub-location data in a column and allow the web user to move items around between sub-locations with ease. This page is also designed to allow the Contractor to perform counts within the location as needed for individual items.
In addition this page is designed to allow the user to edit most of the item data directly on the page. The fields can be changes and once the data has been updated the user can press the green save button allowing the data to be saved to the server.
To the right of the save button is the Edit Icon. This will launch the Edit Item popup that will allow the user to make edits and additional changes to the item that are not available from the listing fields. These additional changes include editing images and the extended or long description.
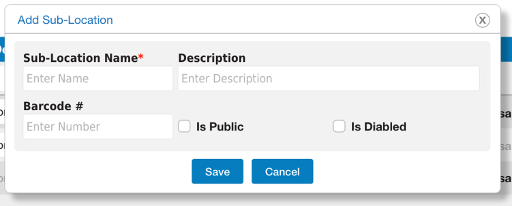
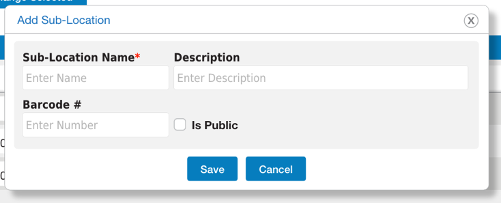 Add Sub-Location Popup
When an item is entered into the system, the user will be asked to enter in where in the general location is the item is located, this is the Sub-Location. The popup will ask the user to enter a new sub-location name, a description of the sub-location, a related barcode if available and state if the sub-location is to be made public or not by checkbox.
To be public means that the Sub-Location will show up to all mobile and web users. You might make a sub-location not public if you wanted to place items in a location and have them not be transferred out. If the public box is NOT checked, the item will only be visible to the web and assigned mobile users even if the location is public.
Change Selected Button – This will take all items that have been checked in the listing and combine them and launch the Edit Sub-Location.
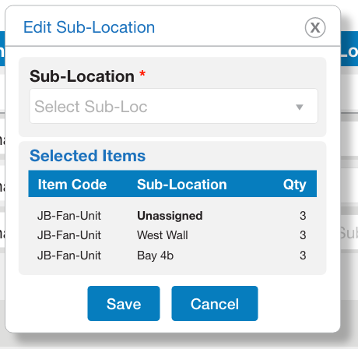 Edit Sub-Location Popup
This box allows the user to edit multiple selected sub-locations at the same time and apply an existing sub-location to all the selected. This is designed to allow the Contractor to quickly move items from on sub-location to another within a selected location.
Unit of Measure Listing
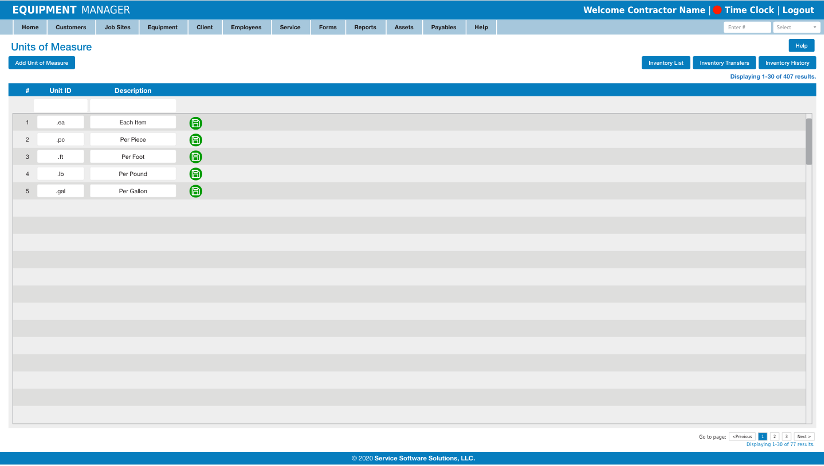
This very simple listing page will allow the Contractor to add units of measure to the system that will be selectable for all inventory items. The user is asked to enter a unit Id of two or three characters. This unit ID is what the system will show when associating the Unit ID with the Item. As an example, the user will enter ft for Foot, or gal for gallon. Next the user will be asked to enter a brief description of what the unit of measure is. Examples are Each Item or Per Foot.
In addition this page is designed to allow the user to edit most of the item data directly on the page. The fields can be changes and once the data has been updated the user can press the green save button allowing the data to be saved to the server.
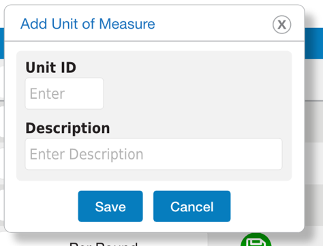 Add Unit of Measure Popup
Clicking the button Add Unit of Measure will trigger a popup that will allow the user to enter the Unit of Measure info. The Contractor can enter as many Units of Measure as needed.
Inventory Transfers Listing
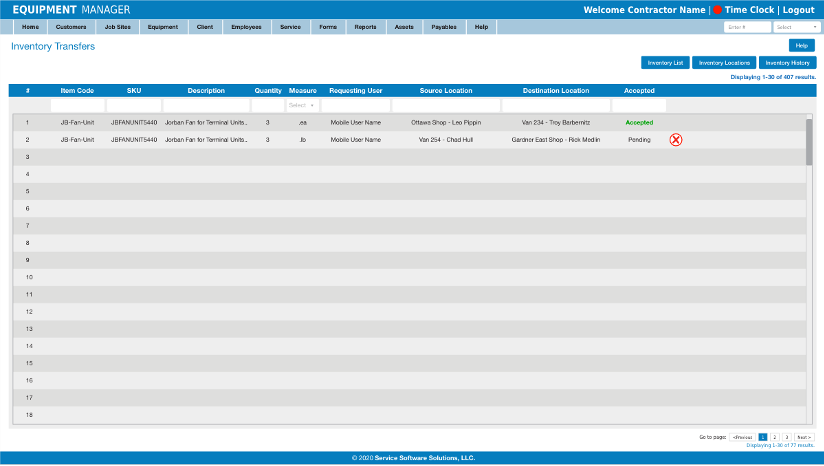
Items can be moved from one location to another. They can also be moved from within a location between sub-locations. Web users can move items instantly between all points by adding sub-locations or adjusting counts as needed. The mobile users must move items by transfer. In order for a mobile user to transfer an item, the user has to first have permission to request transfers for the location that they are moving the item too. Users can view all locations when looking for an item to move, but only locations that the user is assigned to can be receive transfers.
When a transfer happens in the system either by web or mobile, the transfer is logged by the system. This information will show up in this listing. The web user has the ability to view and if needed approve a transfer request from a mobile user. This may be the case if there is not an active user assigned to a location that has been shared with other mobile users. As stated if a mobile user requests a transfer, the user assigned to the source must approve that transfer before the quantity is changed.
The web user also has the option to deny the mobile users request for transfer by declining the transfer. This will remove the request and leave the quantity in the source location as was.
Transfers cannot be triggered from the listing page. The user must make transfer request on the web from the Inventory Item Listing page.
Inventory Use Listing
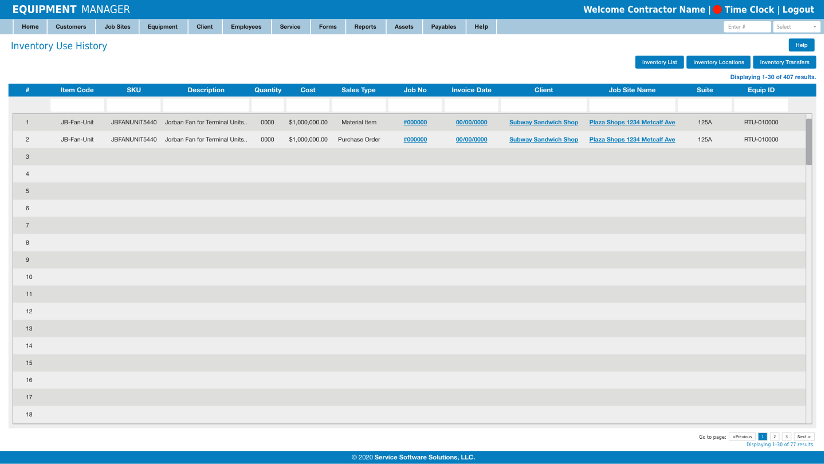
The inventory system will track all the items and quantities that that the mobile users reduce from inventory and place on Jobs though the Service Record Materials screen. Each of these transactions are recorded to the system and can be found and searched by navigating to the Inventory Use History. There, the web users can find basic information about what items, jobs quantities and value was reduced from the inventory. This listing can be reduced by a number of variables.
This page allows the contractor to see what inventory is being consumed and turned into revenue by mobile users using inventory items on jobs. Once a specified quantity of an item is selected by a mobile user and applied to a job by Service Record, the item will be reduced from inventory. The reduction will be recorded to this listing page.
