
Learn about the Job Site, how and why we need to create them in Equipment Manager.
When working in Equipment Manager there are five basic elements that are required to begin working as a Contractor. Those elements, Customer, Job Site, Equipment, Client and Technician are required to create any job. Here we will be explaining the Job Site and how to set up a Job Site in Equipment Manager.
Understanding the Job Site
The Job Site is the location of the Equipment. This could be an office, a warehouse, a shop or simply a plot of land. The Job Site will whatever type of structure it is, have an address. In the chain of elements in Equipment Manager, the Job Site contains Equipment and is Owned by the Customer. This is always the physical location that the Technician travels to when he performs work on a piece of Equipment.
Setting up a Job Site in EM
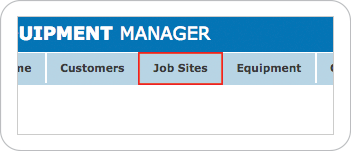
To begin creating a new Job Site we need to first navigate to the Job Site listing page. We do this by clicking on the Job Sites button in the main menu at the top of every page.
Once clicked you will be taken to the Job Site listing page. This page will list all Job Sites that the Contractor has created. The Job Site listing will provide basic information about the Job Site including ID, Job Site name, Customer name, email, address, Equipment list and active status. Once you have created a Job Site and later assign a Customer to it and assigned equipment, you cannot remove the Job Site from the system due to the complex chain of ties to that Job Site.
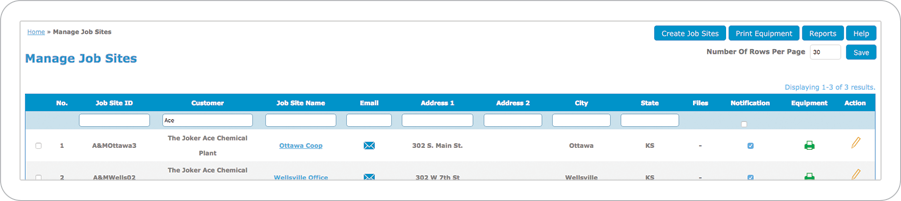
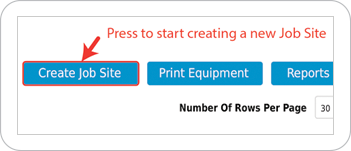
Once we are on the listing page as seen above in our Batjak example, we need to click the Create Job Site button at the top right of the screen.
Once pressed, the New Job Site info page will load. This page is where you will enter basic info about the Job Site including Name, Address, and contact info. Equipment Manager will also help you set up Suites and Floors for your Job Site as explained below. Beyond that are some other important fields of information that Equipment Manager wants to know about your Job Site.
Customer
First thing we want to do is connect your Job Site to a Customer. All Customers need to be entered first as needed before you can start inputting Job Sites.
Job Site ID
This is how you are going to identify and search for your Job Site. This field needs to be Unique.
Job Site Name
This field is where you put in the name of the company or building related to the location. As you type, the EM system is going to cross reference its entire database for matches to what your typing and display in a box below the entry field. If you see a match, selecting that match from the list will populate all the address and phone information that is related to that Job Site.
Job Site Address
If the system does not have a match, you will need to put in an address to the physical location of the Job Site. As you start typing in this box, the system will cross check your text for a matching address using Google Maps. Once you see the Address your looking for, selecting the Address from Google will prepopulate the rest of the address fields with information provided by Google. If you don’t find a match, you will need to populate all the fields manually.
Repair Contact
Most Job Sites will have someone on site that like to be notified if a technician is scheduled to arrive or needs someone site related to contact. Entering Name, Phone, Mobile, and Email for this contact person. Once done, you can check if you want the Site Contact to receive inspection notices, Service Records, or Troubleshooting Alerts.
Contractor’s Estimator
When the Contractor set up the Contractors profile, you listed one or more people that you wanted to be notified if a piece of equipment was marked for replacement. Here is where you assign the current Job Site to one of the Estimators that you created.
Special Instructions
There may be something special about this Customer that you need to let your field personnel know about. Maybe someone needs to be contacted before showing up on a job site. In a case like this you can enter a notice or notes into this field. Anytime a Technician selects a piece of Equipment that is attached to this Customer the mobile device will display your info as a notice to the Technician.
Schedule Alert Emails
If for instance your Customer is a company, there may be multiple people that the Customer wants to be notified if a scheduled inspection is coming due or past due. You can put as many emails as needed into this field separated by semicolons. ( ; )
Suites
It can be common when you create a Job Site that more than one Client may inhabit part of a Job Site. To help separate out a Job Site into multiple area that are capable of being assigned to separate Clients, you may need to create multiple suites. Equipment Manager requires at least one Suite per Job Site. To add a Suite simply enter the name of the suite you wish to create and click the add suite button, this will place the newly created suite in the box listing below. You can do this as many times as needed.
Floors
All buildings have at least one or more floors. Equipment Manager has preset 10 floors, a roof and a basement. If you need to add more floors or wish to add a custom floor name, you can do so by entering your desired floor name into the Create New Floor field and pressing the Add Floor button. Otherwise if you need you can select the pre-existing floors or newly added floors from the Select floors drop menu
Notes
This box is for if you want to make any notes that are strictly related to this particular Customer. You can put in as many notes as needed and can use the Date Timestamp button to enter a timestamp into your notes as needed.
Media
This box is for providing any media in the form of Images and PDF documents that might be related to the Customer. You will have the opportunity to upload the same types of media for any Job Site or piece of Equipment where needed.
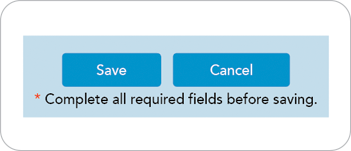
This completes the setup process for setting up a new Job Site. Before you go any further you need to press the save button at the top right or bottom of the screen. Once done successfully you will be taken back to the Job Site Listing page and you should see your new Job Site in the listing.
